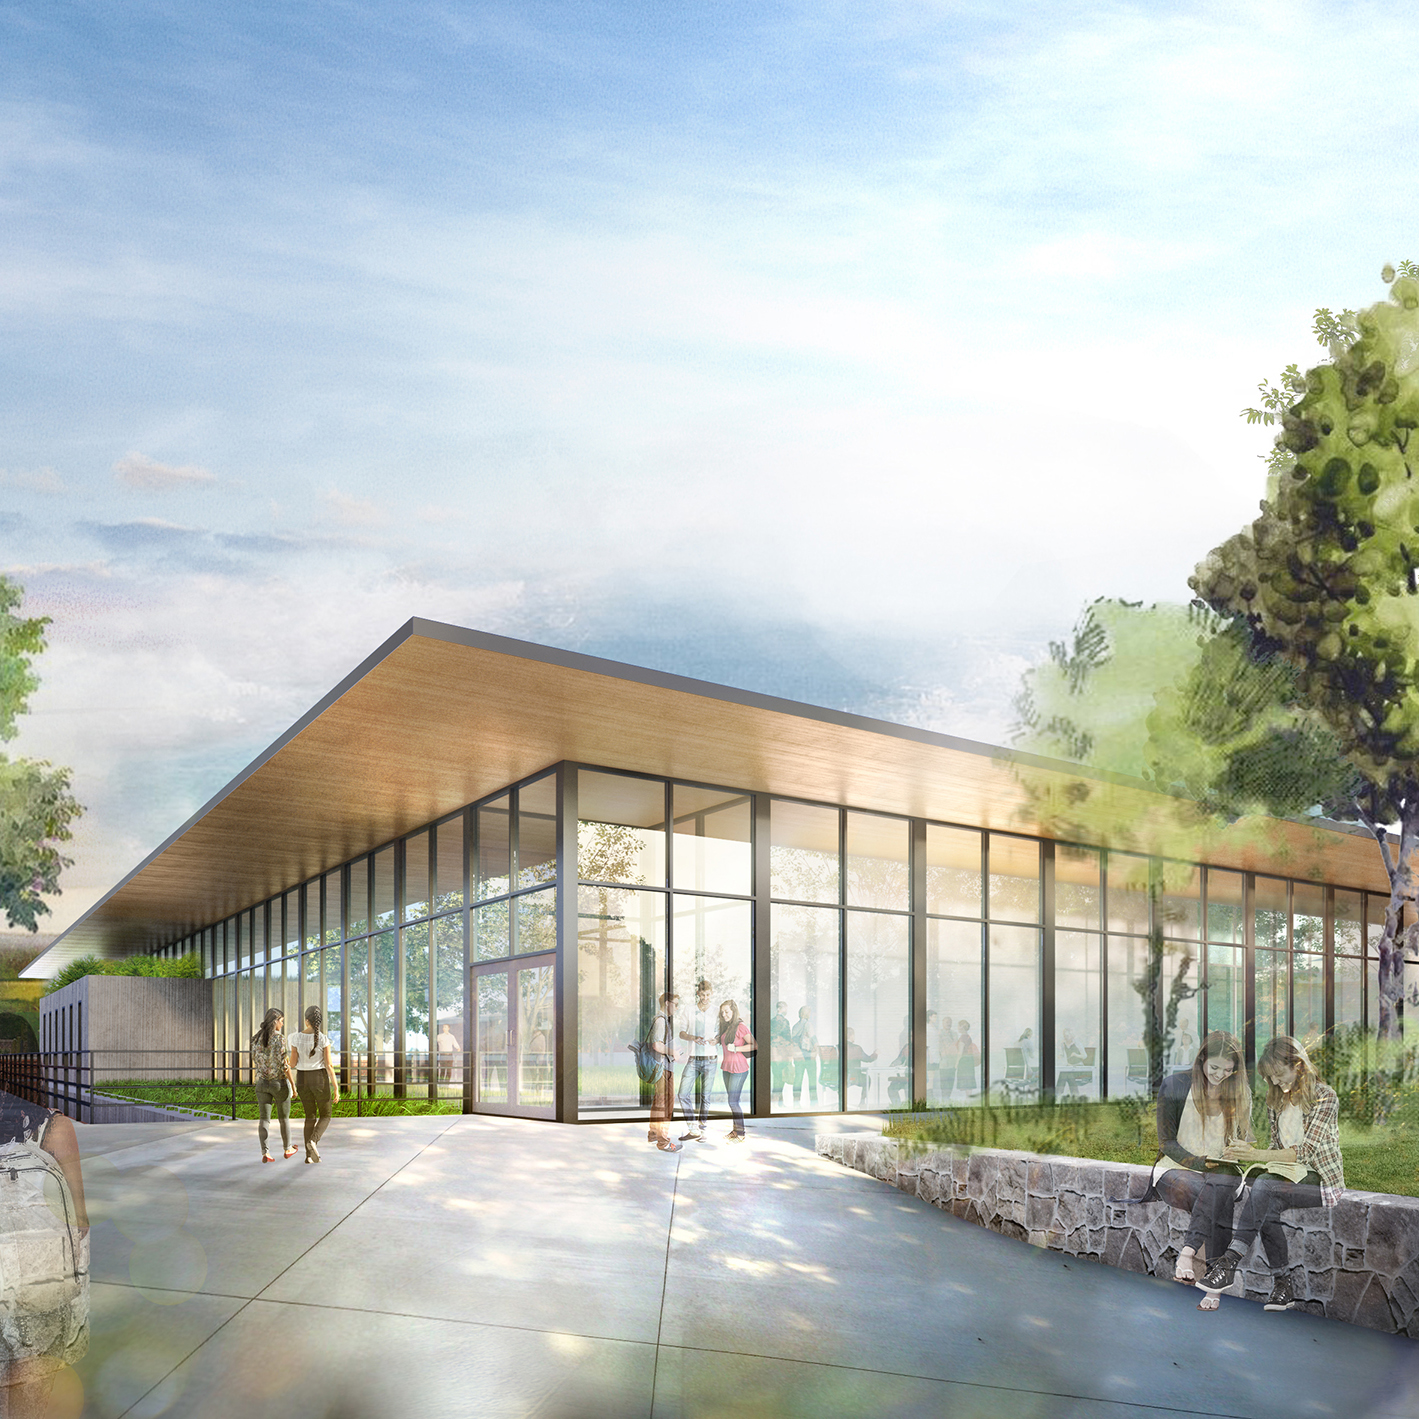
Working with the Cape Cod Community College, we are currently designing a new 45,000 SF Science and Engineering Building that will be home to the STEM education programs including Chemistry, Biology, Physics, Engineering, Environmental Science, and Math. To test ideas about adjacencies and a novel concept of a centralized prep lab supporting eight teaching labs, our design team led several interactive sessions with the College leadership and faculty.
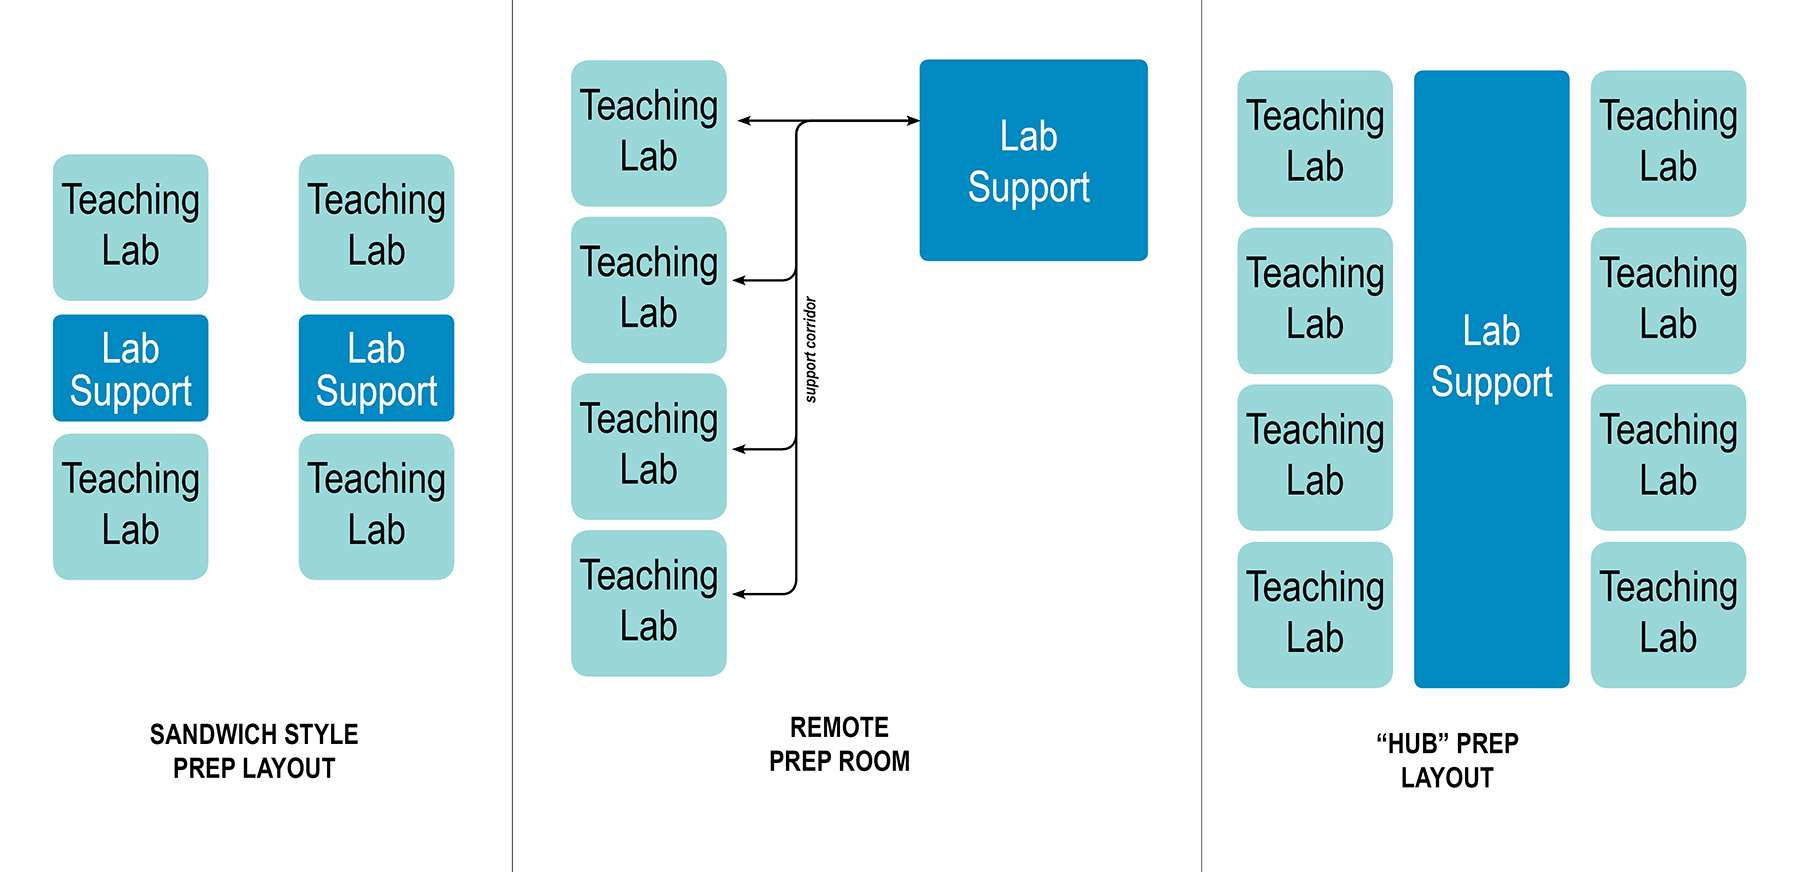
Centralized Prep Lab Design Concept
A centralized prep space will serve as a hub for the eight teaching labs surrounding it, while also allowing the prep zones, typically adjacent to individual labs, to serve a large cluster of labs.
This configuration will allow teaching labs to be more flexibly assigned for lab-based courses since any lab could be served by the prep zone. It will also eliminate redundant or duplicated prep spaces while creating more efficient prep areas for faculty and staff.
However, since this is a new concept, faculty, staff and our team needed to test the concept to ensure the new paradigm for the lab and support spaces would be successful.
Testing the Concept
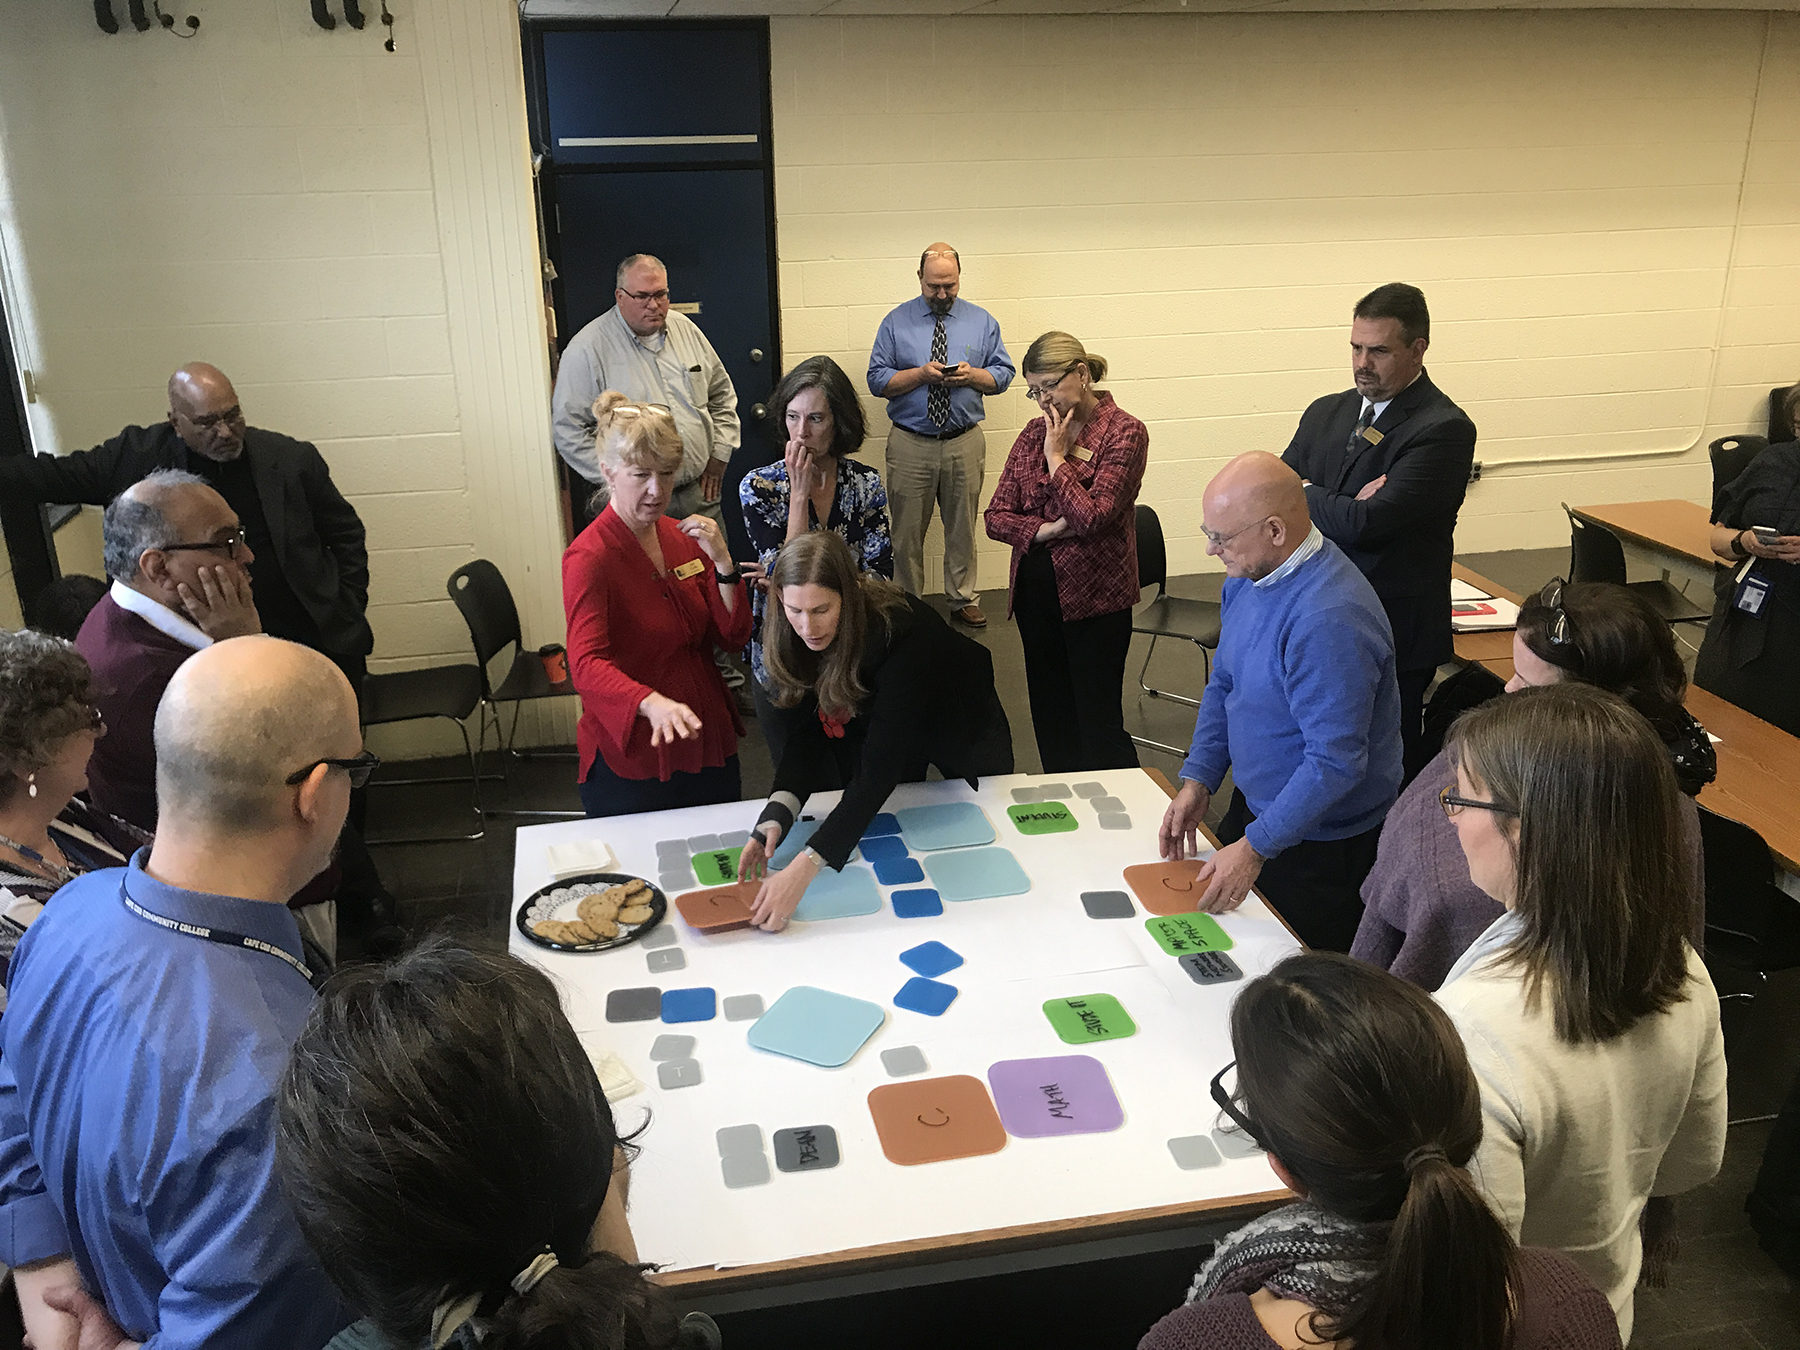
Instead of a traditional slide show presentation explaining the concept, our design team organized an interactive space planning activity to allow the faculty groups to participate in the design and planning process. This way the faculty could clearly understand the concept and the benefits of this new configuration.
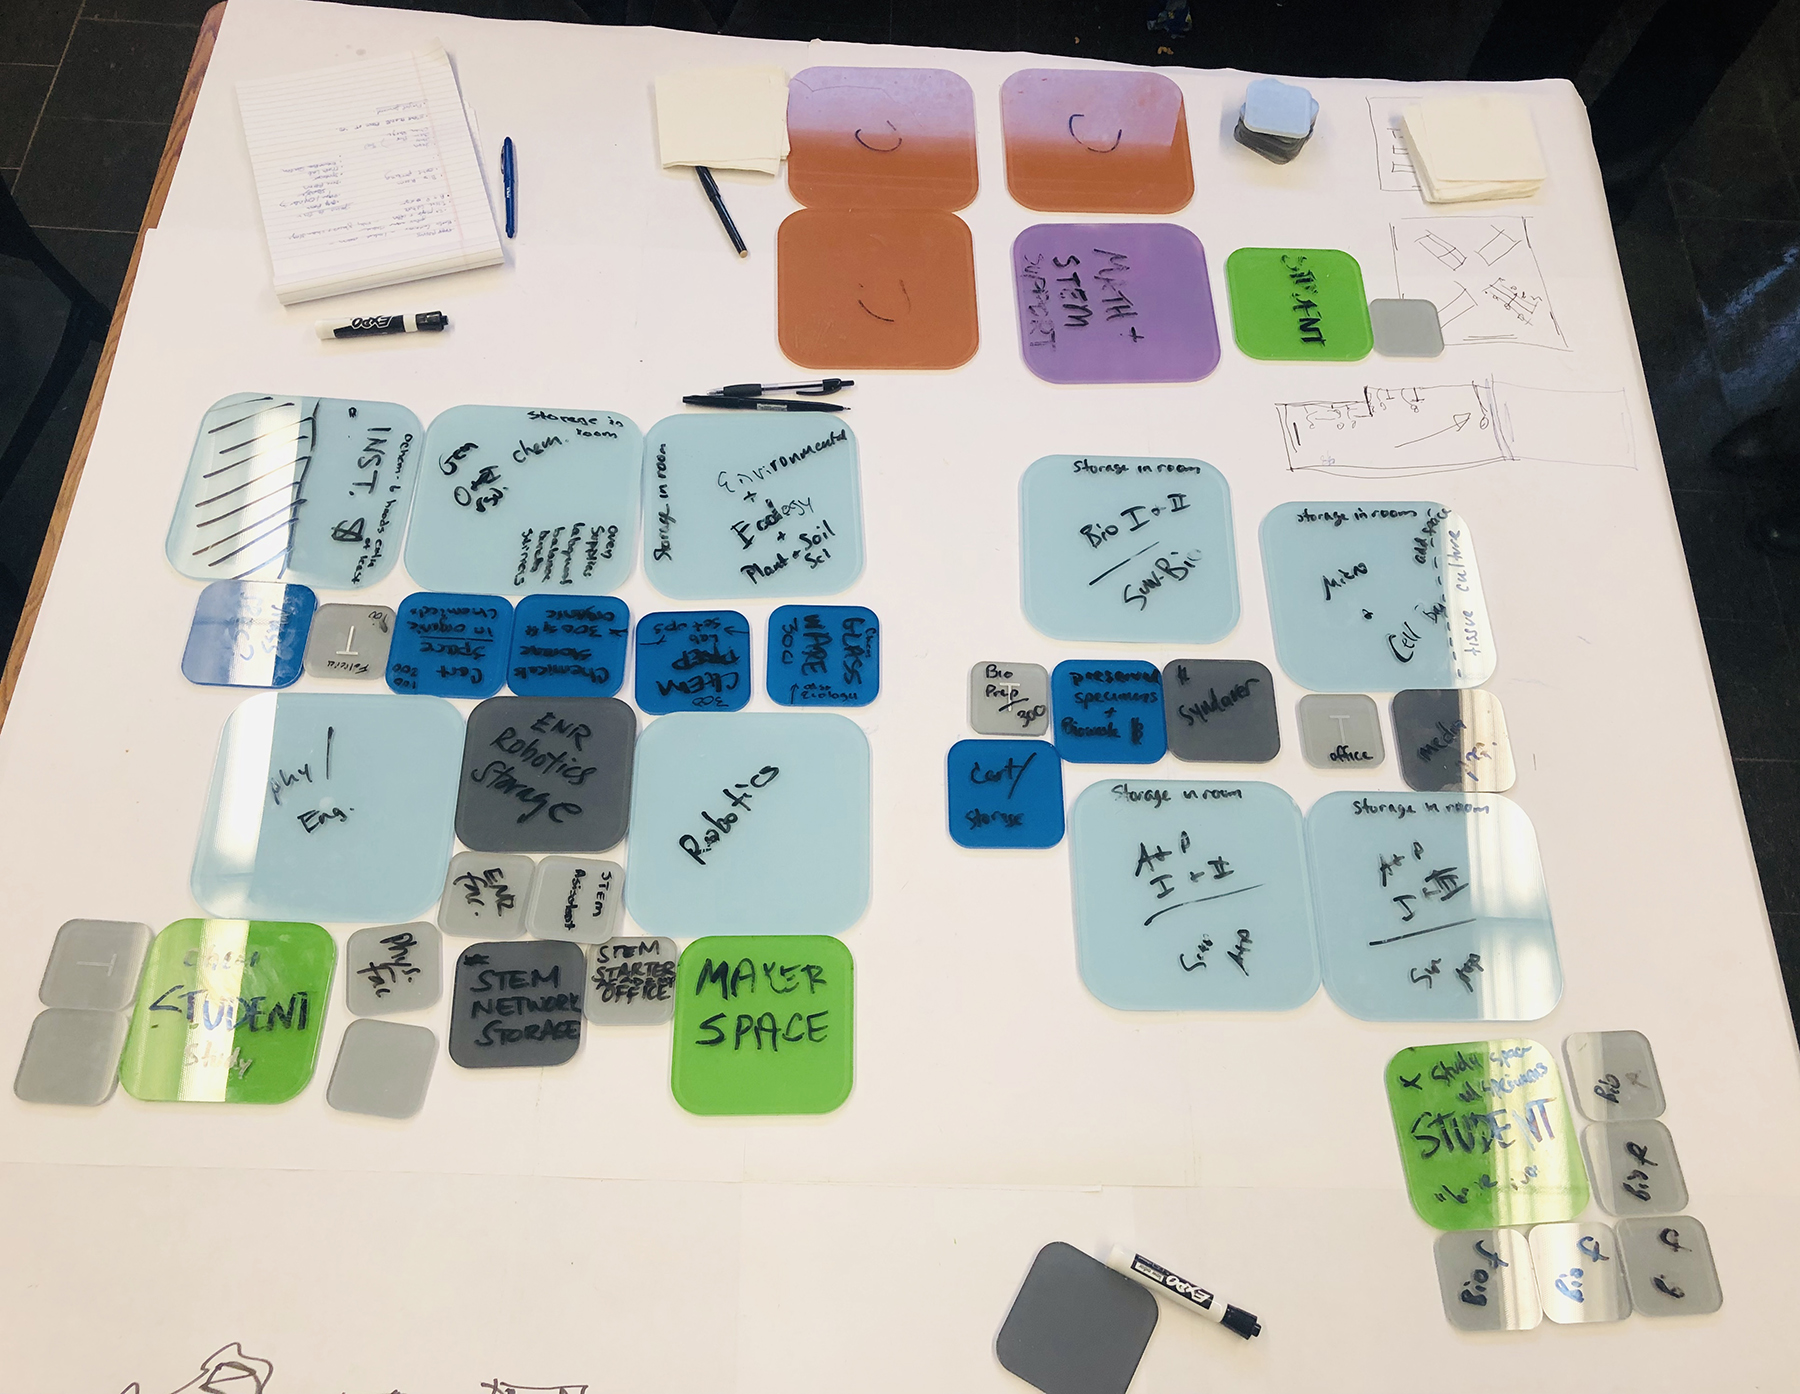
The team constructed colored plexiglass tiles of various scales to represent different spaces in the building and had dry-erase markers to write on the tiles as needed. The tiles provided a clear visual of the various lab layout options, including the sandwich scheme, the centralize but remote prep room and the new centralized hub prep lab design concept.
The College leadership group was intrigued by the idea of the hub prep room and we worked together to program the building around the hub by creating faculty office and student space clusters adjacent to the teaching labs. Initially we did not invite the group to participate in moving the tiles, but as the conversation continued faculty began to move the tiles and illustrate their preferences for clustering certain spaces together.
The Results
As the session progressed, we asked the group to divide the tiles into two floors and together discovered a natural split in the departments, with the maker space, engineering, math and physics clustering together adjacent to the large lecture hall. The Dean and the faculty saw this cluster as a nexus for public events, community outreach and engagement. Biology, Chemistry, Anatomy and Environmental Science (all the wet labs sciences, with chemical and wet prep support space needs), will be clustered together on the other floor, with the supporting chemical and biological storage and prep rooms, the student Bone Study room and the offices and student study spaces to support them.
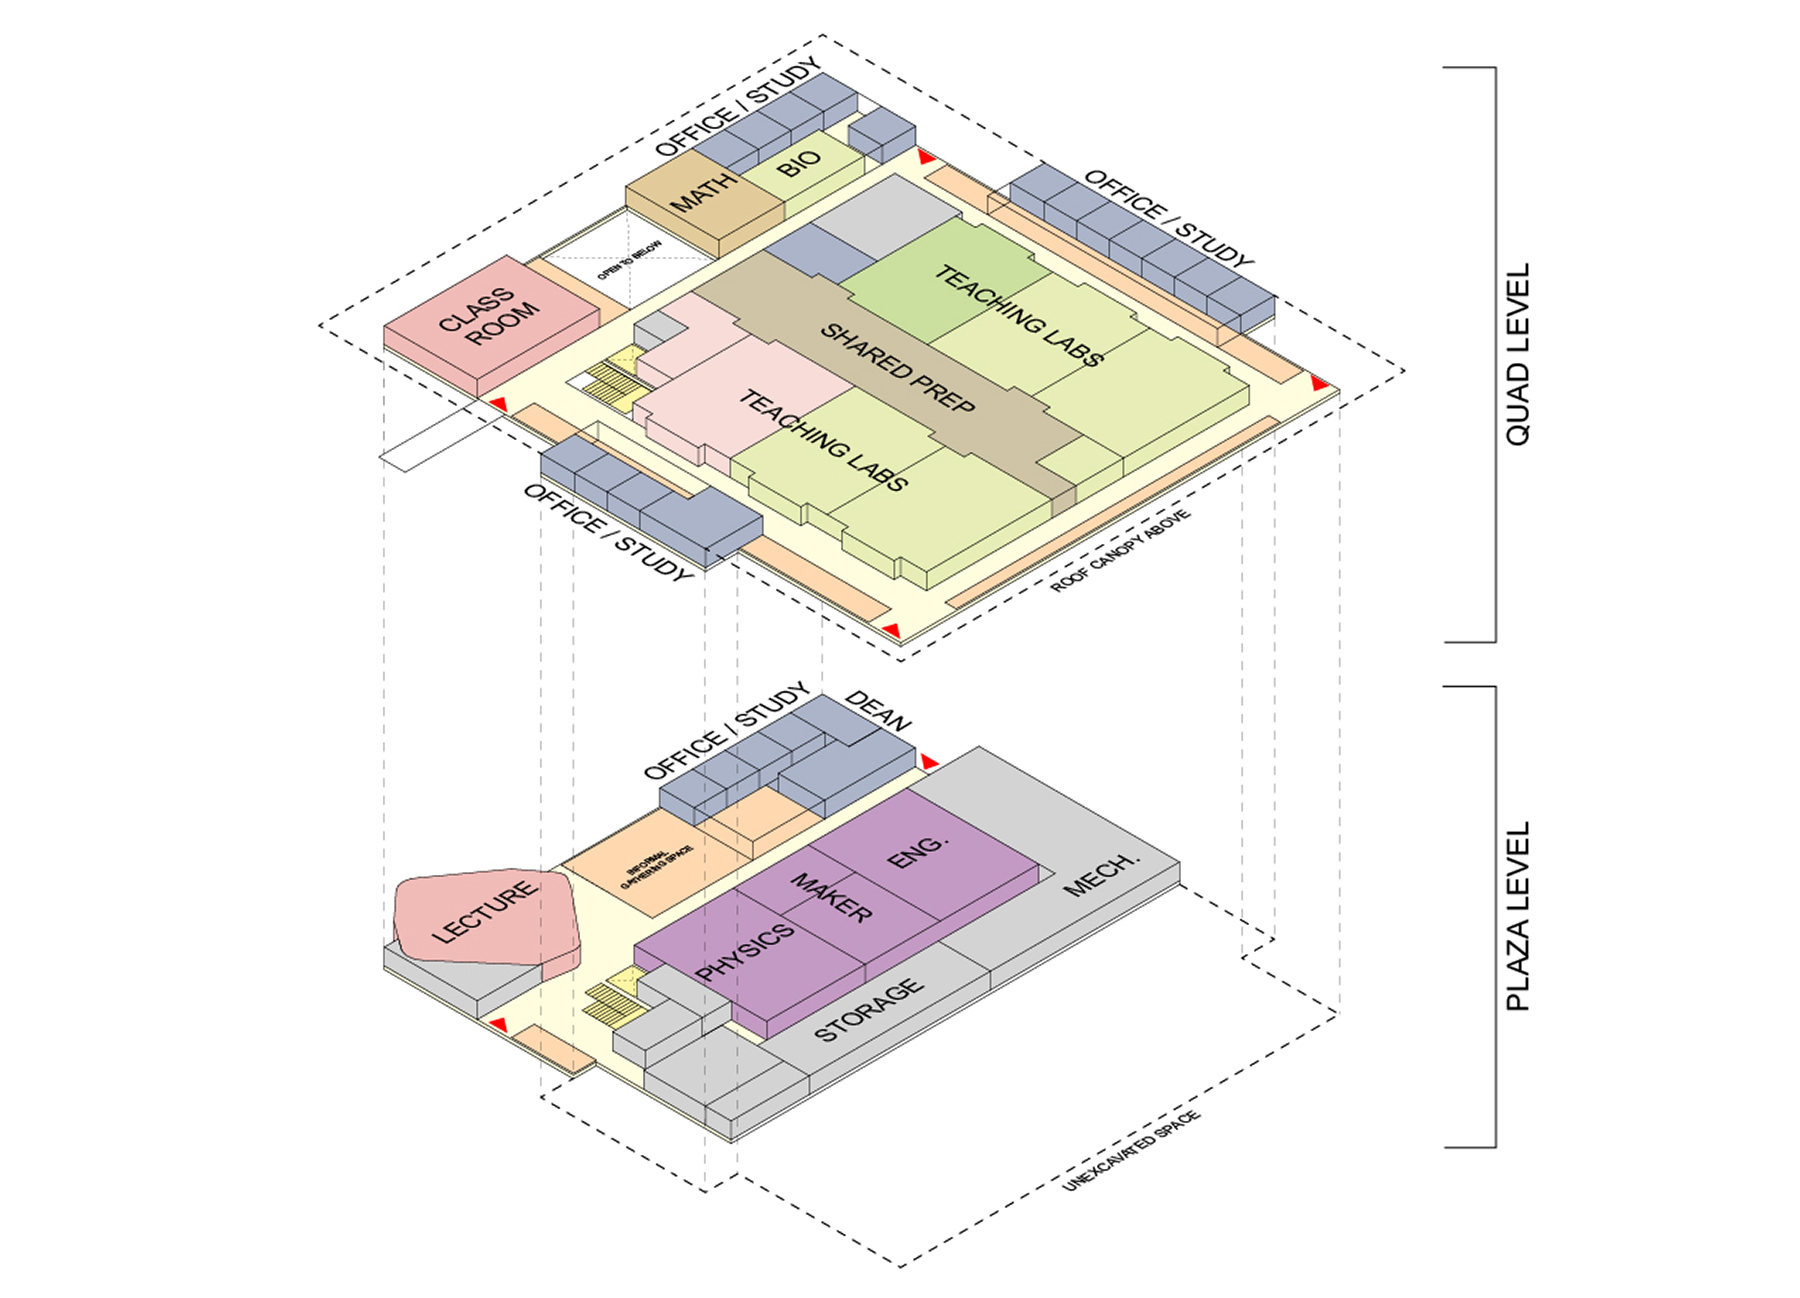
Faculty also used the dry erase makers to note the requirements for the spaces including the equipment needed. Using the unmarked tiles, the group illustrated additional needs and adjacencies that we had not yet identified. For example, in a meeting with the wet lab faculty, we discussed the Syndaver (a synthetic cadaver) and where it should go and how it could enhance the curriculum. Overall, we found the use of colored tiles allowed us to cover more ground, stimulate discussions and engage users in design solutions in a more immediate and impactful way that we had ever anticipated.
This experiment was a great learning experience for me and proved that using flexible design tools during user meetings can facilitate the acceptance of new ideas, but also generate more engaged and productive dialog. As an easy and clear communication tool, the group was able to build upon each other’s ideas and feel intimately connected to the final building design.

